When you install a fresh copy of Windows — whether it’s Windows 10 or Windows 11 — the system usually comes with default settings that prioritize convenience, compatibility, and Microsoft’s ecosystem integration. While these defaults make setup easier for most users, they often compromise on privacy, performance, and usability.
To get the best possible experience from your PC, there are several essential settings you should tweak immediately after installation. These adjustments will help you enhance performance, secure your personal data, and tailor your system to your specific needs.
Below, we’ll explore the top 5 Windows settings you should change right after installation, along with detailed explanations and steps for each.
1. Adjust Privacy and Telemetry Settings
When you first install Windows, Microsoft collects a significant amount of data through its “telemetry” and diagnostic features. While this data helps improve Windows updates and detect errors, it also means your personal activity can be tracked more than necessary. Adjusting privacy settings early ensures your information remains secure and minimizes unnecessary background data sharing.
Why It Matters
By default, Windows tracks location data, app usage, and typing patterns to “personalize” your experience. However, this also sends information to Microsoft servers, which can be a privacy concern for many users. Tweaking these settings keeps your personal information safe and reduces the amount of system telemetry being sent out.
How to Change Privacy Settings
-
Go to Settings → Privacy & Security.
-
Click on General under the “Privacy” section.
-
Turn off the following options:
-
Let apps use advertising ID to make ads more personalized.
-
Send Microsoft info about how I write to improve typing and writing.
-
Let websites show me locally relevant content by accessing my language list.
-
-
Next, go to Diagnostics & Feedback.
-
Select Required diagnostic data instead of “Optional.”
-
Turn off Tailored experiences based on diagnostic data.
-
Optionally, disable Improve inking & typing recognition.
-
-
Under Location, toggle off location services if you don’t need them.
Additional Privacy Tips
-
Disable Cortana if you don’t use it.
-
Turn off “Find My Device” if you’re using a desktop PC that doesn’t move.
-
Check “App permissions” for camera, microphone, and contacts, and disable access for apps you don’t trust.
Result: You’ll stop unnecessary data collection, improve your privacy, and reduce background activity — making your PC more secure and slightly faster.
2. Configure Windows Update and Active Hours
Windows Updates are crucial for maintaining system security, but automatic restarts and forced installations can be frustrating — especially if they occur during work or gaming sessions. Configuring your update settings ensures that updates occur when it’s convenient for you.
Why It Matters
By default, Windows might automatically install updates and restart your computer, sometimes interrupting your work. Customizing update settings gives you control and helps avoid unwanted downtime.
How to Adjust Windows Update Settings
-
Open Settings → Windows Update.
-
Click Advanced options.
-
Under Active hours, set the timeframe when you usually use your PC (for example, 9 AM to 11 PM). This prevents Windows from restarting automatically during those hours.
-
Enable Notify me when a restart is required to finish updating so you can manually control reboots.
-
Turn on Receive updates for other Microsoft products if you use Office, Edge, or Visual Studio — this ensures all your software stays up to date.
-
Optionally, you can pause updates for up to 5 weeks if you want to delay them temporarily.
Optional Step: Limit Bandwidth Usage for Updates
-
Go to Delivery Optimization → Advanced options.
-
Set the Download bandwidth limit to prevent Windows from using too much of your internet connection while updating.
Result: You’ll enjoy smooth updates without annoying interruptions or performance slowdowns caused by background downloads.
3. Optimize Power and Performance Settings
Windows balances performance and energy efficiency by default — but this often limits your system’s potential, especially on desktop PCs or high-end laptops. By adjusting the power plan and performance options, you can make your PC faster and more responsive.
Why It Matters
Default power settings are designed for average use, meaning your CPU and GPU might not run at full power when needed. Optimizing performance settings ensures your PC delivers maximum speed without unnecessary throttling.
How to Adjust Power Settings
-
Go to Settings → System → Power & Battery.
-
Under Power Mode, select Best performance for desktops or Balanced for laptops (to save battery).
-
Click on Additional power settings to open the classic Control Panel view.
-
Choose High performance or Ultimate Performance (available on some systems).
Advanced Performance Tweaks
-
Disable visual effects:
-
Right-click This PC → Properties → Advanced system settings.
-
Under Performance, click Settings.
-
Choose Adjust for best performance or manually disable only heavy effects (like animations and transparency).
-
-
Enable storage optimization:
-
Go to Settings → System → Storage.
-
Turn on Storage Sense to automatically delete temporary files and empty the recycle bin.
-
Result: Your system will boot faster, run applications more smoothly, and handle multitasking better — especially if you have limited RAM or an older CPU.
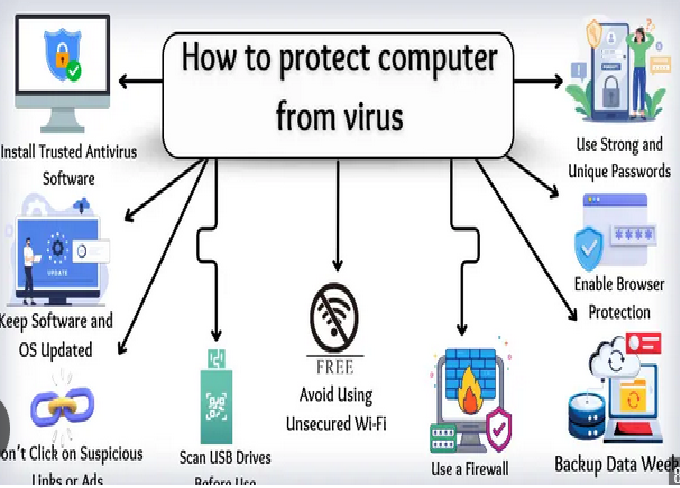
4. Customize Security and Defender Settings
Windows Defender (also known as Microsoft Defender Antivirus) provides strong built-in protection, but fine-tuning its settings ensures maximum security without excessive resource usage. Adjusting firewall, ransomware protection, and SmartScreen settings gives you better control over what’s allowed on your system.
Why It Matters
Cybersecurity threats are everywhere, and relying solely on default settings isn’t always enough. A properly configured Windows Security setup can protect your files from ransomware, phishing, and malicious software without needing third-party antivirus software.
How to Configure Windows Security
-
Open Windows Security → Virus & threat protection.
-
Click Manage settings under “Virus & threat protection settings.”
-
Ensure that Real-time protection, Cloud-delivered protection, and Automatic sample submission are all enabled.
-
Scroll down and enable Tamper Protection — this prevents malware from disabling Defender.
Set Up Ransomware Protection
-
Under Ransomware protection, click Manage ransomware protection.
-
Turn on Controlled folder access — this blocks unauthorized apps from changing your important files.
-
Add folders like Documents, Pictures, and Desktop to the protected list.
Enable SmartScreen Protection
-
Go to App & Browser Control.
-
Under Reputation-based protection, enable:
-
Check apps and files
-
SmartScreen for Microsoft Edge
-
Potentially unwanted app blocking
-
Result: Your system becomes much more resistant to online threats, phishing attacks, and data breaches — all without reducing performance.
5. Personalize File Explorer and Taskbar Settings
Once your system is secure and optimized, it’s time to make Windows more user-friendly. Customizing File Explorer and the Taskbar not only improves productivity but also reduces distractions and makes navigation smoother.
Why It Matters
Windows comes with features like “Quick Access,” OneDrive integration, and taskbar recommendations that many users find unnecessary. By cleaning up these features, you make the interface simpler and more efficient.
How to Customize File Explorer
-
Open File Explorer → View → Options.
-
Under the General tab:
-
Set Open File Explorer to: This PC instead of Quick Access.
-
Uncheck Show recently used files in Quick Access.
-
Uncheck Show frequently used folders in Quick Access.
-
-
Go to the View tab (in older versions) or Appearance settings in Windows 11:
-
Enable File name extensions and Hidden items for more control.
-
Disable Compact view if you prefer larger spacing.
-
-
Disable OneDrive if you don’t use it:
-
Right-click the OneDrive icon → Settings → Unlink this PC.
-
Customize Taskbar Settings
-
Right-click the Taskbar → Taskbar settings.
-
Turn off features you don’t need, such as:
-
Widgets
-
Chat
-
Task View (optional)
-
-
Move the Taskbar alignment to Left if you prefer the classic Windows look.
-
Enable or disable System tray icons based on your preferences.
Customize Start Menu
-
Go to Settings → Personalization → Start.
-
Turn off Show recently added apps and Show recently opened items.
-
Pin your most-used apps for quick access.
Result: Your desktop becomes cleaner, faster, and easier to navigate — giving you a more personalized and professional workspace.
Bonus Tip: Disable Unnecessary Startup Apps
Many apps automatically set themselves to start when Windows boots up, increasing startup time and consuming memory unnecessarily. Disabling unwanted startup programs is one of the easiest ways to improve performance.
How to Disable Startup Apps
-
Press Ctrl + Shift + Esc to open Task Manager.
-
Go to the Startup Apps tab.
-
Right-click on unnecessary apps (like Spotify, Skype, or game launchers) and choose Disable.
You can also manage this through Settings → Apps → Startup in Windows 11.
Result: Your computer will start faster, and you’ll save CPU and memory for more important tasks.
Final Thoughts
After installing Windows, it’s tempting to jump straight into using your PC — but spending a few minutes customizing these key settings makes a world of difference.
By adjusting privacy controls, update preferences, power settings, security features, and interface customization, you create a system that’s not only faster and safer but also tailored to your workflow.
Here’s a quick summary of what you achieve with these changes:
| Setting | Benefit |
|---|---|
| Privacy Settings | Protects personal data and limits Microsoft tracking |
| Windows Update | Prevents unexpected restarts and controls update timing |
| Power Settings | Boosts system performance and reduces lag |
| Security Settings | Shields against malware and ransomware |
| Personalization | Improves usability and workflow efficiency |
Ultimately, these five essential tweaks transform your fresh Windows installation from a generic setup into a personalized, high-performance environment optimized for security, privacy, and productivity.
If you make these adjustments right after installation, your Windows PC will not only feel faster but also more reliable and secure for years to come.