Linux has become one of the most popular operating systems in the world, powering everything from personal computers to web servers and even smartphones. Its open-source nature, strong security, and wide range of distributions make it an attractive choice for both beginners and experts. However, if you’re new to Linux, the installation process might seem confusing at first.
This detailed guide will walk you through how to install Linux step-by-step, from downloading the ISO file to setting up your system after installation. By the end, you’ll be ready to use Linux confidently on your PC or laptop.
1. Understanding What Linux Is
Before installing Linux, it’s important to understand what it actually is. Linux is not just a single operating system—it’s a family of open-source systems based on the Linux kernel. Each version of Linux is called a distribution (or distro). Some popular distributions include:
-
Ubuntu – User-friendly and great for beginners.
-
Linux Mint – Offers a Windows-like interface.
-
Fedora – Cutting-edge features and technologies.
-
Debian – Known for stability and reliability.
-
Kali Linux – Used for ethical hacking and cybersecurity testing.
Each distro has its own features and software repositories, but the installation process is very similar for all of them.
2. System Requirements for Installing Linux
Before installation, make sure your computer meets the minimum system requirements. These can vary depending on the distribution, but here’s a general overview:
Minimum Requirements:
-
Processor: 1 GHz or faster
-
RAM: 1 GB (2 GB recommended for smooth performance)
-
Hard Drive: 15 GB of free space (20 GB recommended)
-
USB Port or DVD drive (for installation media)
-
Internet connection (optional but helpful)
If your PC is old or low on resources, lightweight distributions like Lubuntu, Xubuntu, or Linux Lite are good options.
3. Choosing the Right Linux Distribution
The first and most important step is selecting the Linux distribution that best fits your needs.
For beginners, the most recommended distributions are:
-
Ubuntu – Easy to use, large community support, and frequent updates.
-
Linux Mint – Based on Ubuntu, offers a familiar desktop experience similar to Windows.
-
Zorin OS – Designed for users transitioning from Windows or macOS.
If you’re learning Linux for programming or cybersecurity, you might consider:
-
Fedora – For developers and testers.
-
Kali Linux – For ethical hackers and security researchers.
Once you choose your distribution, head to its official website and download the ISO image.
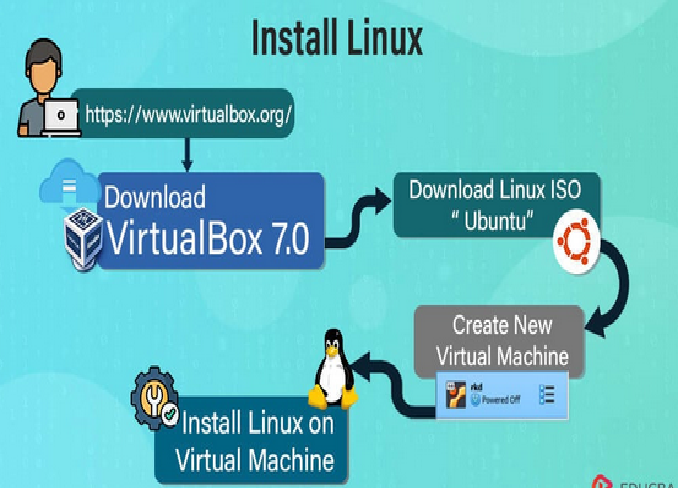
4. Downloading the Linux ISO File
An ISO file is an image of the Linux installation media. To download it:
-
Visit the official website of your chosen Linux distro.
-
Find the Download section.
-
Select the version suitable for your system (usually 64-bit).
-
Save the ISO file to your computer.
The ISO file is typically between 1.5 GB and 4 GB in size depending on the distribution.
5. Creating a Bootable USB Drive
Once you’ve downloaded the ISO file, you need to create a bootable USB drive. This will allow your computer to boot directly into the Linux installer.
You will need:
-
A USB drive with at least 8 GB of storage.
-
A tool to create the bootable USB (such as Rufus, Etcher, or UNetbootin).
Steps to create a bootable USB (using Rufus on Windows):
-
Insert your USB drive into the computer.
-
Open Rufus.
-
Under “Device,” select your USB drive.
-
Click “Select” and browse for your Linux ISO file.
-
Keep the default settings (File System: FAT32, Partition Scheme: GPT or MBR).
-
Click Start to begin the process.
Once it’s done, your USB drive is ready for installation.
6. Back Up Your Important Data
Before you install Linux, always back up your data. If you plan to install Linux alongside Windows, your files will usually remain safe, but it’s still wise to make a copy. Use an external hard drive, cloud storage, or another USB drive to back up important documents, photos, or work files.
7. Booting from the USB Drive
Now that your bootable USB is ready, it’s time to boot your computer from it.
Steps:
-
Insert the USB drive into the computer you want to install Linux on.
-
Restart the computer.
-
While it’s starting up, press the Boot Menu key (usually F2, F10, F12, or Esc, depending on your system).
-
Select your USB drive from the boot device list.
-
The Linux installer screen should appear within a few seconds.
Most Linux distros also give you the option to “Try without installing”, which allows you to test the system before committing to installation.
8. Trying Linux Without Installing
This is one of the most powerful features of Linux distributions. When you boot from the USB, you can try Linux in live mode.
This allows you to:
-
Explore the desktop environment.
-
Test hardware compatibility (Wi-Fi, sound, graphics, etc.).
-
Use built-in applications.
If everything works well, proceed with installation by double-clicking the Install Linux icon on the desktop.
9. Starting the Installation Process
When you begin the installation, you’ll be guided through several steps. Let’s go through them one by one.
Step 1: Choose the Language
Select your preferred language for the installation and the system interface.
Step 2: Keyboard Layout
Choose your keyboard layout. The default English (US) layout works for most users.
Step 3: Connect to the Internet
If you’re connected via Wi-Fi or Ethernet, the installer may ask for your network password. An internet connection can help download updates during installation.
Step 4: Installation Type
This is an important step where you choose how to install Linux.
You’ll usually have these options:
-
Install alongside Windows (Dual Boot): Keeps your current OS and installs Linux alongside it.
-
Erase disk and install Linux: Deletes everything and installs Linux as the only OS.
-
Something else: For advanced users who want to manually partition their drives.
For beginners, the “Install alongside Windows” option is safest.
10. Setting Up Disk Partitions
If you select “Something else,” you can manually create partitions. This is optional but good for learning.
Common partition setup:
-
Root (/) – Where the system files go (20–30 GB).
-
Home (/home) – Stores personal files and settings.
-
Swap area – Acts as virtual memory (2–4 GB recommended).
If you’re unsure, let the installer handle partitioning automatically.
11. Choosing Your Time Zone
Next, you’ll be asked to select your time zone. The installer usually detects it automatically, but you can adjust it manually using a map or dropdown list.
12. Creating a User Account
Now you’ll create your user profile.
-
Your Name: Any name you like.
-
Computer Name: The name that appears on your network.
-
Username: Your login name.
-
Password: Choose a strong password.
You can also select whether to log in automatically or require a password every time.
13. Installing Linux
After confirming all your settings, click Install Now.
The installer will:
-
Format the chosen partitions.
-
Copy system files to the hard drive.
-
Install the Linux kernel and basic utilities.
This process usually takes between 10 to 30 minutes, depending on your hardware and internet speed.
14. Finishing Installation and Rebooting
Once installation is complete, you’ll see a message like “Installation Complete. Please remove the installation media and restart your computer.”
-
Remove the USB drive.
-
Press Enter to reboot.
-
Your computer will now load the Linux bootloader (GRUB).
If you dual-booted, you’ll see a menu to choose between Windows and Linux every time you start your PC.
15. First Boot into Linux
After rebooting, you’ll be greeted by your new Linux desktop.
Log in with the username and password you created earlier.
You can now start exploring your system. You’ll see a taskbar (or dock), application menu, and system settings—very similar to Windows or macOS.
16. Updating Your Linux System
The first thing you should do after installation is update your system.
For Ubuntu and most Debian-based distros:
For Fedora:
These commands ensure that all software packages and security patches are up to date.
17. Installing Essential Software
Linux distributions come with a set of pre-installed applications like Firefox, LibreOffice, and a media player. However, you might want to install more tools.
Some useful software for beginners:
-
Google Chrome or Brave – Web browsers.
-
VLC Media Player – Plays all media formats.
-
GIMP – For image editing.
-
Visual Studio Code – For programming.
-
Steam – For gaming.
You can install software through the Software Center (a graphical app store) or via the terminal using package managers like apt, dnf, or pacman.
18. Setting Up Drivers
Most modern Linux systems automatically detect and install hardware drivers. However, if you have proprietary hardware (like NVIDIA graphics cards), you may need to install drivers manually.
For example, on Ubuntu:
This installs the best available drivers for your hardware.
19. Customizing the Desktop Environment
One of the best things about Linux is customization. You can change themes, icons, wallpapers, and even the desktop environment itself.
Some popular desktop environments:
-
GNOME – Modern and minimal.
-
KDE Plasma – Highly customizable and elegant.
-
XFCE – Lightweight and fast.
-
Cinnamon – Looks similar to Windows.
You can install them with just a command or from your package manager.
20. Setting Up Dual Boot Management
If you installed Linux alongside Windows, the GRUB bootloader handles the startup menu.
You can change the default OS and boot time using tools like:
This allows you to reorder entries or set Linux as the default OS.
21. Common Post-Installation Tasks
After installing Linux, consider doing the following:
-
Enable automatic updates.
-
Install your preferred web browser.
-
Add multimedia codecs (for MP4, MP3, etc.).
-
Connect to cloud storage (Google Drive, Dropbox).
-
Set up a firewall using
ufw:
22. Troubleshooting Installation Problems
Sometimes, installation might fail due to common issues like:
-
Corrupt ISO file: Re-download it.
-
Faulty USB drive: Use a different USB stick.
-
BIOS/UEFI settings: Make sure Secure Boot is disabled.
-
Partition errors: Delete and recreate partitions manually.
Linux forums and community support pages are excellent resources if you face errors.
23. Benefits of Installing Linux
Once you have Linux installed, you’ll enjoy several advantages:
-
Free and Open Source: No licensing fees.
-
Secure: Less vulnerable to malware.
-
Customizable: Tailor it exactly how you want.
-
Efficient: Works well even on older hardware.
-
Developer-Friendly: Ideal for programming, networking, and cybersecurity.
24. Learning Basic Linux Commands
Familiarizing yourself with terminal commands can greatly enhance your Linux experience. Here are a few to start with:
25. Conclusion
Installing Linux might seem intimidating at first, but as you’ve seen, it’s actually a straightforward process when done step by step. From downloading the ISO file and creating a bootable USB to setting up your system and installing software, every step brings you closer to experiencing the power and flexibility of open-source computing.
Whether you want to learn programming, enhance privacy, or revive an old computer, Linux is the perfect operating system to explore. Once you get comfortable, you’ll realize how much control, stability, and performance Linux gives compared to traditional systems.